As someone who loves DIY projects and making the most out of home spaces, I recently embarked on an exciting venture to build a wooden bunk bed. Last week, we finished building our DIY twin over queen bunk bed. This project not only allowed me to create a personalized space-saving solution but also brought a sense of accomplishment once I saw the final results. In this detailed guide, I’ll share the steps I followed to construct a sturdy and stylish wooden bunk bed.
Step 1: Planning and Design
The first step was crucial—planning and designing the bunk bed. I considered the size of the room, the height of the ceilings, and the age of the users to ensure safety and comfort. I opted for a traditional twin-size bunk bed design, ensuring ample headroom between the bunks and from the top bunk to the ceiling.
Step 2: Materials and Tools
Next, I gathered all the necessary materials and tools. For the bunk bed, I chose high-quality pine wood for its durability and ease of working. The list of materials included wooden planks, posts, screws, and safety rails. Key tools included a saw, drill, sander, measuring tape, and screwdriver.
Step 3: Cutting and Sanding
I began by cutting the wood to the required sizes based on my design. Accuracy here was key to ensuring all pieces fit perfectly later on. After cutting, I thoroughly sanded each piece to remove rough edges and prepare the wood for a smooth finish.
Step 4: Assembling the Frames
The assembly started with the lower bunk frame, setting a solid foundation. I constructed the rectangular base and attached the four posts securely at each corner. Next, I similarly assembled the upper bunk, ensuring it was perfectly aligned with the lower bunk.
Step 5: Installing the Slats and Safety Features
I then placed wooden slats across the frames of both bunks to support the mattresses, spacing them evenly for optimal support. Safety was my top priority, so I installed robust safety rails on the upper bunk along with a sturdy ladder for easy access.
Step 6: Finishing Touches
For the finishing touches, I chose a non-toxic wood stain and sealant to enhance the wood’s natural grain and protect it from wear and tear. This step also added a cozy, aesthetic appeal to the bunk bed, making it an inviting space.
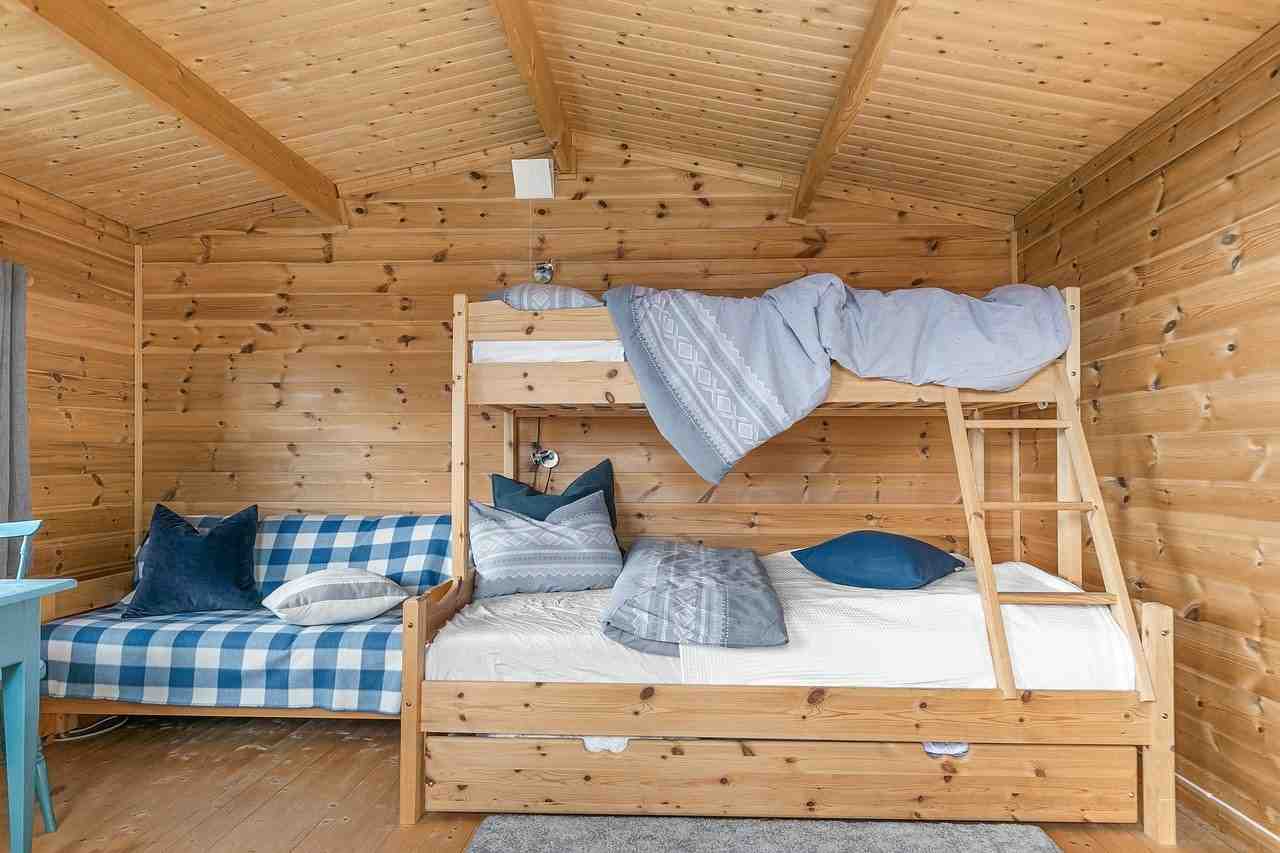
Step 7: Setting Up and Decoration
Once the paint and sealant dried, I moved the bunk bed into its designated room. I set up the mattresses, added some comfortable bedding, and decorated the area around the bunk bed to create a fun and functional space for sleep and relaxation.
Conclusion
Building this wooden bunk bed was a fulfilling project that not only added functional sleeping arrangements to my home but also infused it with a personal touch. This DIY endeavor is perfect for anyone looking to enhance their home’s functionality and aesthetic. With some basic tools, quality materials, and a bit of patience, you too can create a durable and beautiful piece of furniture that will serve your family for years to come.
For our next project, we’re planning to build a queen over queen bunk bed.